Event Management
Create and manage multi-date events that tie your areas, positions, availability, and scheduling together into a single season or show run.
Before You Start
Events depend on areas and positions. If you have not set those up yet, complete the Areas & Positions guide first. You need at least one area before you can create an event.
Mental model: An “event” in Graveyard Shift groups multiple show dates together under a single name. Think of it as a container for an entire season or run. For example, an event called “Atrox Factory October 2025” might hold 15 individual show dates, each with its own start and end time. Areas, availability, and staff assignments all hang off the event and its dates.
Creating an Event
Follow these steps to create a new event. The entire process takes about two minutes once you have your dates planned out.
Navigate to Event Management
From the Admin Dashboard, open the Admin Tools section and click Event Management. You will see a list of existing events (if any) and a button to create a new one.
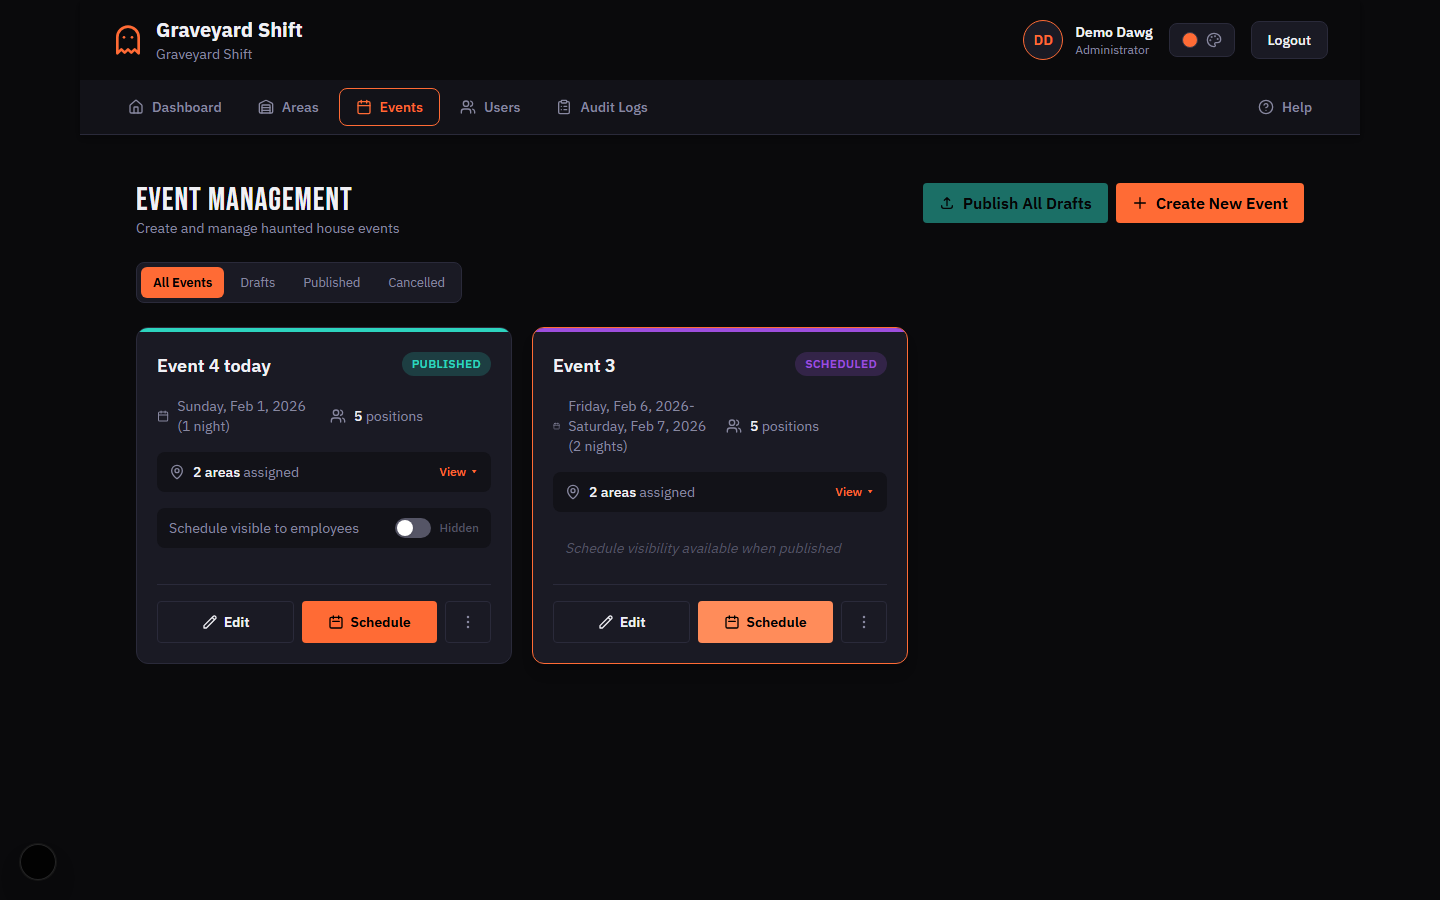
Click Create New Event
Click the Create New Event button in the page header. A modal opens with the event creation form.
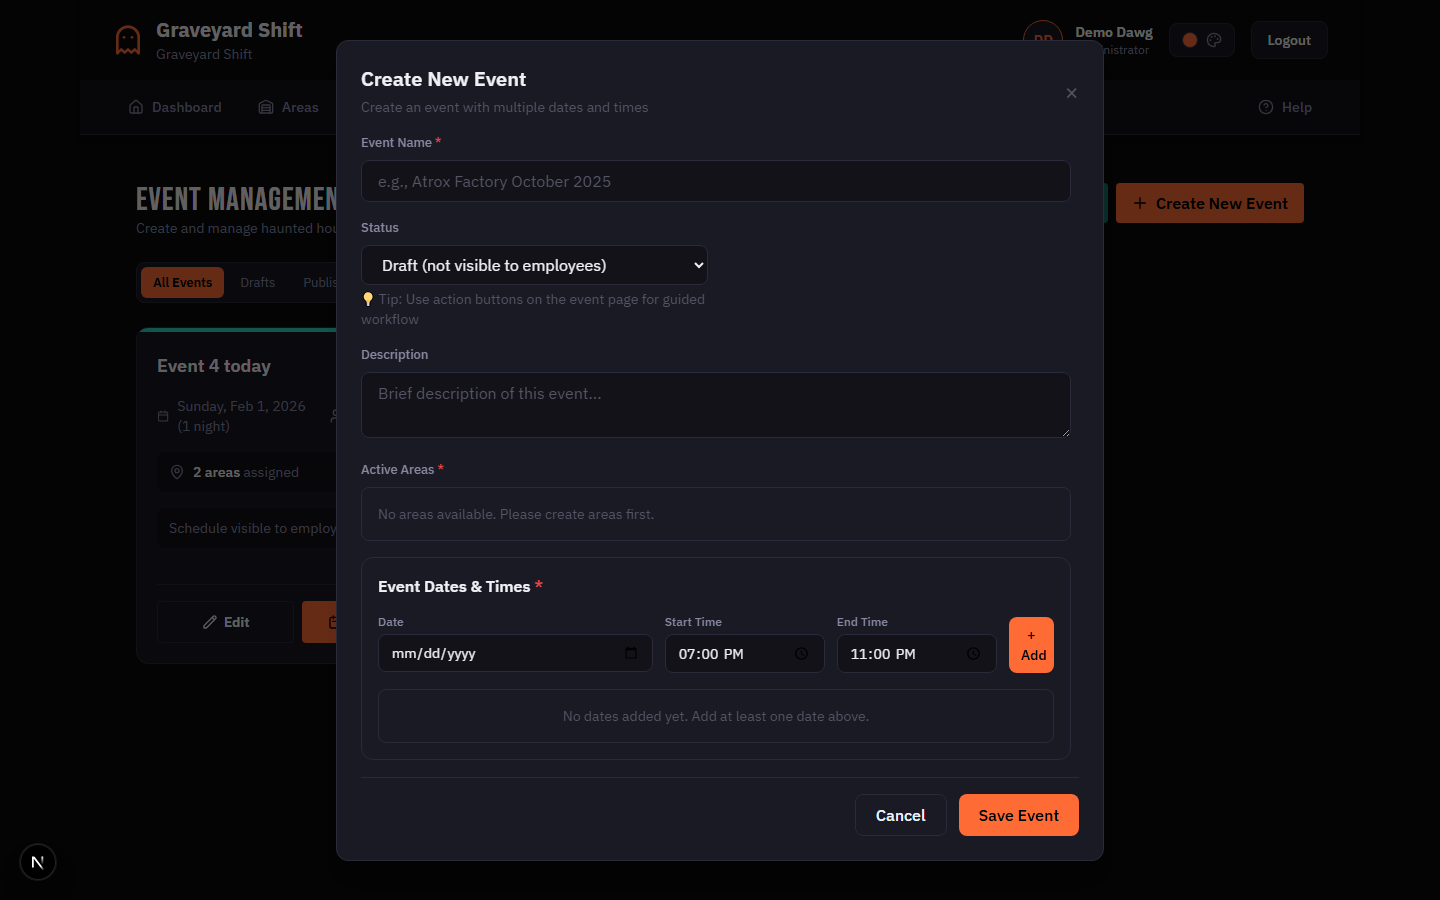
Fill in the event details
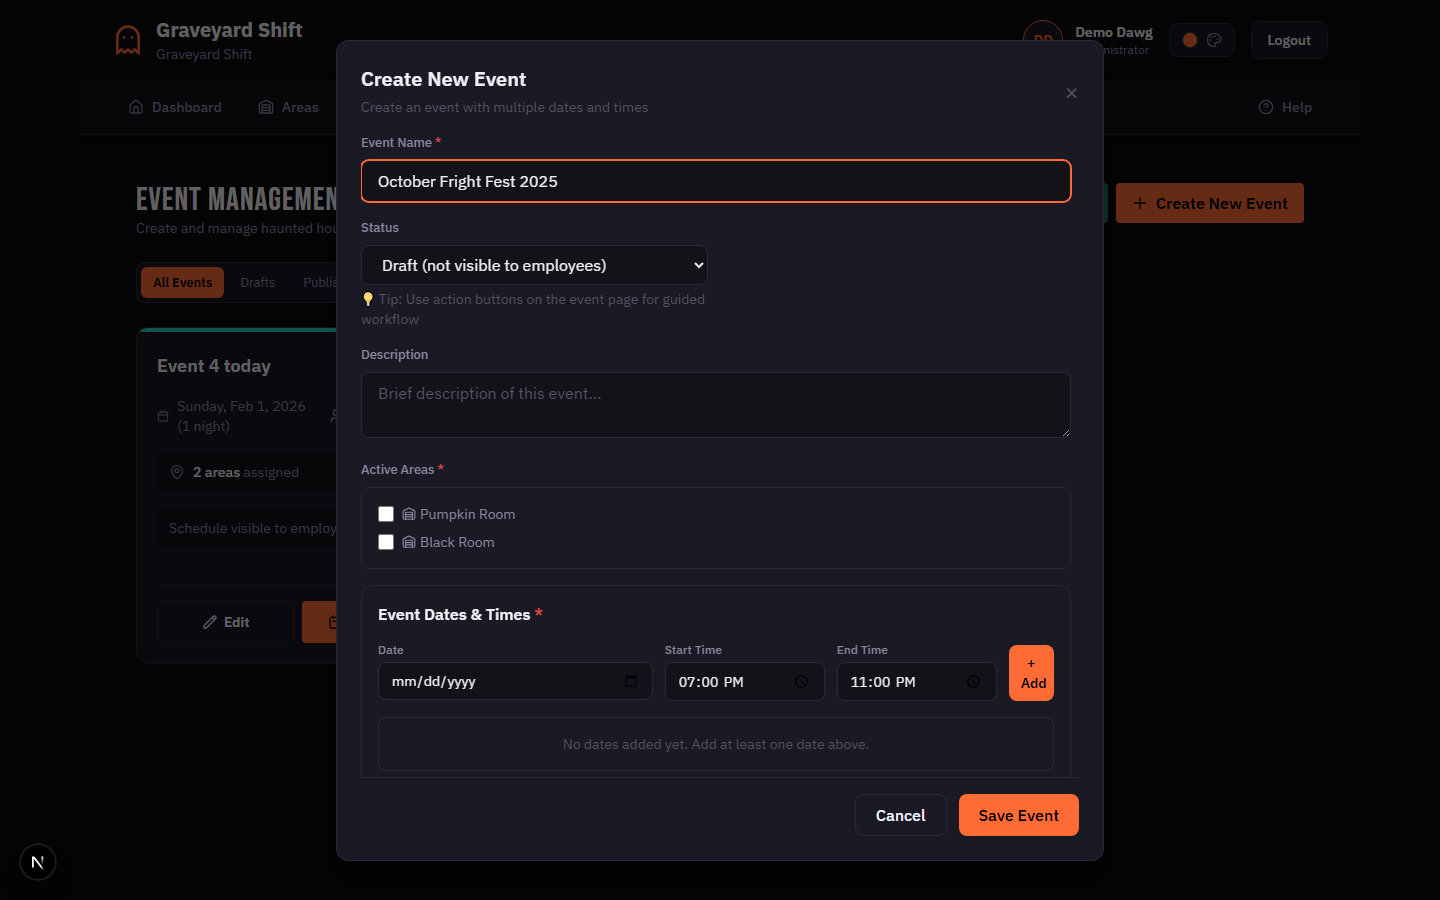
Enter an event name, optional description, choose which areas are active for this event, and add one or more show dates with start and end times. See the field reference table below for details on each field. Click Save when you are finished.
Event Field Reference
| Field | Required | Description |
|---|---|---|
Event Name | Yes | A unique name for the event within your company. Maximum 255 characters. Example: "Atrox Factory October 2025". |
Description | No | An optional summary visible to admins. Use it to note the theme, special instructions, or anything relevant to planning. |
Status | Yes | Dropdown with five options: Draft, Collecting Availability, Scheduled, Published, and Cancelled. New events default to Draft. See the Event Status Workflow section below for details. |
Active Areas | Yes | Checkboxes listing every area in your company. Select at least one. Only the checked areas will be available for scheduling on this event. |
Event Dates | Yes | One or more date entries. Each entry includes a calendar date, a start time, and an end time. You must add at least one date. Default times are 7:00 PM to 11:00 PM. |
Special Notes | No | Free-text notes for internal use. Good for recording theme-night details, weather contingencies, or VIP information. |
Event Status Workflow
Every event moves through a series of statuses. Each status controls what employees can see and what actions admins can take.
| Status | Visible to Employees | What Happens |
|---|---|---|
| Draft | No | The event is being built. Admins can edit all fields, add or remove dates, and change active areas freely. Employees cannot see the event at all. |
| Collecting Availability | Yes (dates only) | Employees can see the event dates and submit their availability for each one. Admins can still edit event details but should avoid removing dates employees have already responded to. |
| Scheduled | No | Availability collection is closed. Admins use the scheduling interface to assign staff to positions for each date. Employees cannot see assignments yet. |
| Published | Yes (full schedule) | Employees can see their assignments, confirm attendance, and view event details. Admins can still make last-minute assignment changes. |
| Cancelled | No | The event is inactive. Employees no longer see it. An event can be cancelled from any status. Cancelling preserves all data so the event can be reopened later. |
The typical progression is Draft → Collecting Availability → Scheduled → Published. You can skip intermediate steps if needed (for instance, going directly from Draft to Published), but following the full workflow gives you the best visibility into staff availability before you build the schedule.
Managing Event Dates
Each event contains one or more dates. You can manage dates from the event detail view by clicking Edit Event.
Adding Dates
Click Add Date inside the event form to append a new date row. Select a calendar date, then set the start and end times. The default times are 7:00 PM to 11:00 PM. You can add as many dates as your season requires. All times use a 12-hour format with AM/PM.
Removing Dates
Click the remove button next to any date row to delete it from the event. This is only possible for dates that have no staff assignments. If a date has been assigned to one or more employees, it is considered locked.
Locked Dates
A date that already has staff assignments is shown with a lock icon and cannot be removed. This prevents accidental deletion of dates that have scheduling work attached. To unlock a date, first remove all staff assignments for that date through the scheduling interface, then return to the event form to remove it.
Duplicating Events
Duplication lets you copy an existing event as a starting point for a new one. This is especially useful when setting up a new season that follows a similar structure to a previous one.
To duplicate an event, open the event's row in the event list and click the More menu, then select Duplicate.
What Gets Copied
- Event name (with “(Copy)” appended)
- Description
- Active areas
- All event dates with their start and end times
- Special notes
What Does Not Copy
- Staff assignments (availability changes every season)
- Employee availability responses
- Attendance confirmations
The new event is always created with Draft status regardless of the original event's status. Rename it, adjust the dates to your new season, and proceed through the normal workflow.
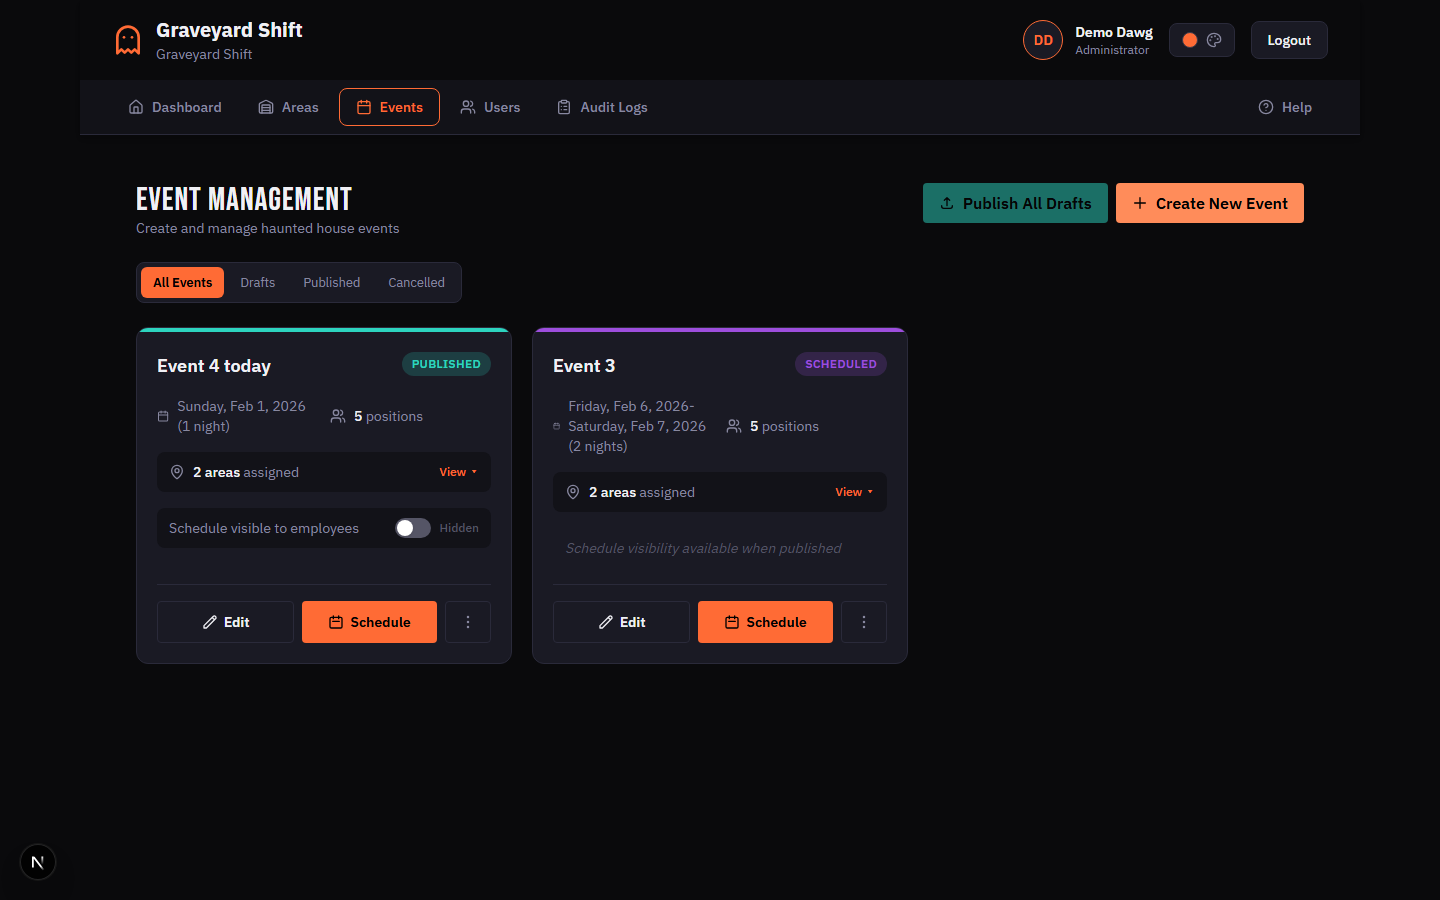
Batch Publishing
If you have several draft events ready to go live at the same time, you can publish them all at once instead of updating each one individually.
Click the Publish All Drafts button in the Event Management page header. The system will move every Draft event that has at least one date to Published status in a single operation.
Draft events that have no dates are skipped automatically. They remain in Draft status so you can add dates to them later.
Best Practices
- Name events by season and year. Use a descriptive name like “Fall 2025 Main Season” or “Halloween Weekend 2025”. This makes it easy to find events later and avoids confusion when you have multiple seasons.
- Add all dates before collecting availability. Employees submit availability per date. If you add more dates after availability collection has started, those new dates will have no responses and you will need to ask employees to update their availability.
- Use Draft status while building. Keep events in Draft until the dates and areas are finalized. This prevents employees from seeing incomplete or incorrect information.
- Duplicate last season and adjust dates. Rather than creating every event from scratch, duplicate a previous season's event and update the calendar dates. This carries forward your area selections and date patterns.
- Use Special Notes for theme nights. If certain dates have a special theme (blackout night, VIP night, charity event), note it in the Special Notes field so other admins and managers can see the context at a glance.
Troubleshooting
Areas don't show up in the event form
The Active Areas checkboxes are populated from your company's area list. If no areas appear, you have not created any yet. Go to Areas & Positions and create at least one area before returning to Event Management.
Can't remove a date
Dates that have existing staff assignments are locked and cannot be removed. Look for the lock icon next to the date. To remove a locked date, open the scheduling interface for that date, clear all assignments, then return to the event form and remove the date.
Employees can't see the event
Events are only visible to employees when their status is Collecting Availability or Published. If your event is still in Draft or Scheduled status, employees will not see it. Change the status to make it visible.
Duplicate event name error
Event names must be unique within your company. If you see this error, another event already uses the same name. Choose a different name or add a distinguishing detail (such as the year or a subtitle) to make it unique.